Recently, I needed to add a static image as an overlay on an animated GIF. I thought it would be easy, but it was a bit more complicated than I had thought.
Making an animated GIF image in Photoshop is relatively easy. However, adding an overlay image to a GIF animation can be tricky.
In this quick tutorial, I will show you how to add a static image to a GIF using Photoshop. I use this technique whenever I need to add an arrow on an animated gif to divert user attention to something.
Why Add an Image to an Animated GIF?
I write tutorials and how-tos as part of my full-time job. This requires me to annotate many screenshots so the readers can easily follow along.
However, sometimes a plain screenshot image is not enough. In those cases, I create quick GIF animations using Droplr. It is a free screenshot capture tool for Mac and Windows computers and as browser extension for Google Chrome, Firefox, and more.
Occasionally, I need to annotate the GIF by adding an arrow or highlighting some areas to make it easier for our users to understand. Here is an example:

Droplr doesn’t let me annotate the GIF images. This is where Photoshop comes to the rescue.
Adding an Image On Animated GIF Image in Photoshop
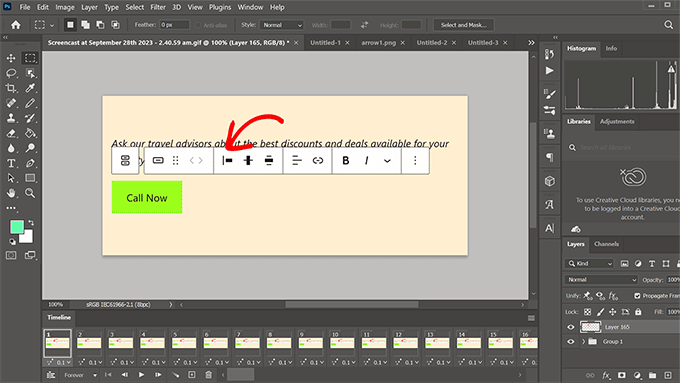
First, you need to open your animated GIF in Adobe Photoshop.
After that, select all layers. The easiest way to do that is by clicking the top layer to select it and then click on the bottom layer while pressing the SHIFT key on your keyboard.
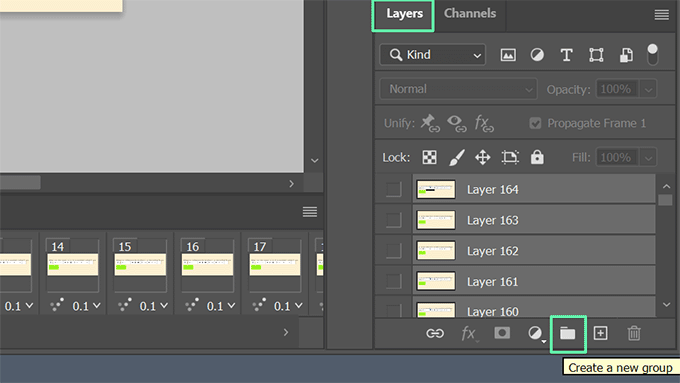
Now, add these layers to a group by pressing the CTRL+G keys on your keyboard. You can also add selected layers to a group by clicking on the tiny folder icon under the Layers panel.
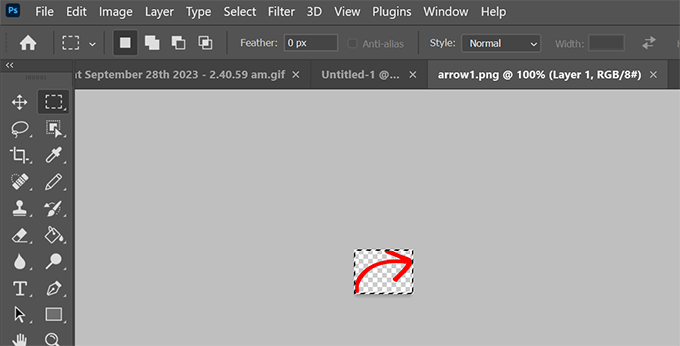
Next, open the image or the clipart you want to place over the animated GIF.
Ideally, this image should be a PNG image with a transparent background.
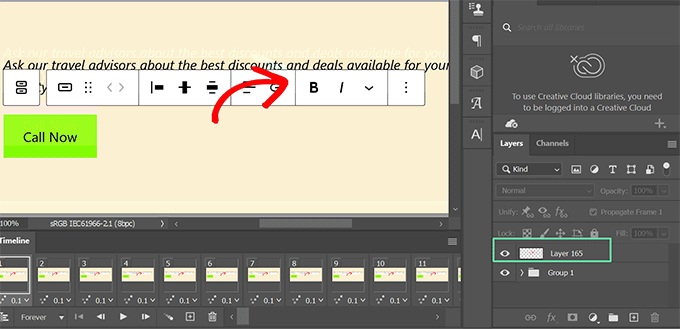
Now copy the image and paste it into your GIF image.
It will appear as a new layer in your GIF image.
Ensure your static image is outside and on top of the Group containing your original GIF layers.
You can do that now if you need to adjust the static image.
Once you are finished, click on the File > Export > Save for Web (Legacy) menu.
From here, ensure that you have selected GIF as the file type. Then, you can adjust other settings to reduce the file size without deteriorating quality.
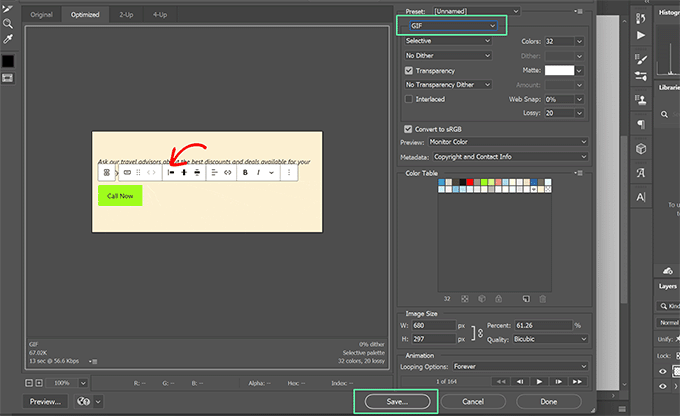
You can also click the player control buttons to run the animation in the preview.
Finally, click the Save button to export and save your updated GIF image.
You can now preview this file in a browser window to see how it looks outside Photoshop. Here is the sample image I made with an arrow placed over the animated GIF.
I hope this quick tutorial helped you learn how to easily place a static image overlay to an animated GIF in Photoshop.
If you would like to read more Photoshop tutorials for content writers and bloggers, please let me know, and I will try to share more of them in the future.
